In this article, we are going to build REST APIs of C.R.U.D. using Express + TypeScript + MySQL, deploying the server on Render and host database on Clever Cloud.
All the code is being pushed onto this repo, feel free to check it.
Now, let’s get started!
TL:DR
- Project goal
- Setup MySQL
- Install project dependencies
- Setup Express server
- Router
- Model
- Controller
- Test the APIs
- Deploy our server and host the database
- References
Project goal
Our project goal in this article is to build a post service which servers these APIs:
| METHOD | Router | Description |
|---|---|---|
| GET | /post/ | get all posts |
| GET | /post/:postId | get post by postId |
| POST | /post/ | create new post |
| PUT | /post/:postId | update post by postId |
| DELETE | /post/:postId | delete post by postId |
Setup MySQL
We will to create a database in our local environment first, and after the project is done with development and testing, we will start a machine on Clever Cloud and create the online database on the service later.
If you haven’t had a MySQL installed on your computer, you can read this article first.
1$ mysql -u root -p
2# wait for the prompt and enter your MySQL password for root
After entering password, we shall be logged into MySQL.
Create database and table
Now, let’s create the database crud_express_mysql_demo:
1CREATE DATABASE crud_express_mysql_demo;
Then, let’s create the table post inside the database:
1CREATE TABLE post (
2	id INT AUTO_INCREMENT PRIMARY KEY,
3	title VARCHAR(255) NOT NULL,
4	content VARCHAR(1000) NOT NULL,
5	created_at DATETIME NOT NULL DEFAULT CURRENT_TIMESTAMP,
6	updated_at DATETIME NOT NULL DEFAULT CURRENT_TIMESTAMP ON UPDATE CURRENT_TIMESTAMP
7)
8ENGINE=innodb CHARSET=utf8mb4 COLLATE utf8mb4_general_ci;
Each post should contain id, title , content , created_at and updated_at.
The primary key will be the id, and we also giving it AUTO_INCREMENT attribute so we don’t have to calculate the index every time we insert / update new post into the table.
We are giving created_at and updated_at a default value of current time by adding CURRENT_TIMESTAMP attribute. For updated_at inside a certain row, every time we update the row, it will be updated to the CURRENT_TIMESTAMP.
At last, we specify the engine, charset and case insensitive by adding:
1ENGINE=innodb CHARSET=utf8mb4 COLLATE utf8mb4_general_ci;
After table creating, you can check the schema by running:
1DESCRIBE TABLE post;
Insert some data for later testing
We will inserted some fake data in order for later testing:
1INSERT INTO post(title, content) VALUES
2('title1', 'content1'),
3('title2', 'content2'),
4('title3', 'content3'),
5('title4', 'content4'),
6('title5', 'content5'),
7('title6', 'content6');
To check if the data is being correctly inserted, run this:
1SELECT * FROM post;
After all these are done, we can head over to create our Express server.
Install project dependencies
First create a Github repo, clone it and use it as our project folder:
1$ git clone git@github.com:<YOUR_GITHUB_ACCOUNT>/<PROJECT_NAME>.git
2$ cd <PROJECT_NAME>
Then run npm init -y to install package.json inside the project.
Project installation
To start a Express + TypeScript server, we will install these:
1$ npm i express typescript
2$ npm i @types/express --save-dev
After TypeScript is being installed, run this to generate tsconfig.json .
1$ npx tsc -init
2# tsconfig.json tells the compiler how to compile typescript to javascript
Then we will install nodemon , it is a tool that helps us automatically restarting the node application every time we save the indicated file:
1$ npm i nodemon ts-node --save-dev
2# also install ts-node to prevent typescript error
Then we touch a server.ts in the root, and add command inside the script of package.json to start watching the server change with nodemon:
1$ touch server.ts
1// server.ts
2console.log("Hello world");
1// package.json
2{
3	// ...
4  "scripts": {
5		"dev": "node server.ts",
6		"dev:watch": "nodemon server.ts",
7    // ...
8  },
9}
1$ npm run dev:watch
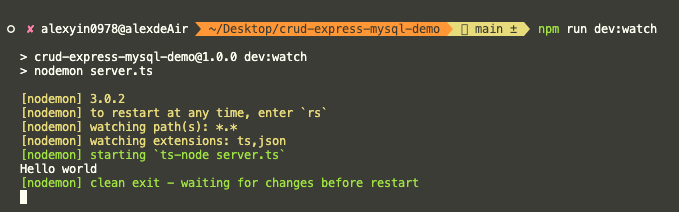
Now, every time we save server.ts, nodemon is going to refresh the server for us.
.env and .gitignore
Touch .gitignore inside root and add these files’ name into it to prevent them from pushing onto Github:
1$ touch .gitignore
1# .gitignore
2
3# Logs
4logs
5*.log
6
7# Runtime data
8pids
9*.pid
10*.seed
11
12# Directory for instrumented libs generated by jscoverage/JSCover
13lib-cov
14
15# Coverage directory used by tools like istanbul
16coverage
17
18# Grunt intermediate storage (http://gruntjs.com/creating-plugins#storing-task-files)
19.grunt
20
21# node-waf configuration
22.lock-wscript
23
24# Compiled binary addons (http://nodejs.org/api/addons.html)
25build/Release
26
27# Dependency directory
28# https://docs.npmjs.com/cli/shrinkwrap#caveats
29node_modules
30
31# Debug log from npm
32npm-debug.log
33
34.DS_Store
35
36.env
These prevents some confidential or unnecessary information from being pushed onto Github.
We will store some confidential information inside .env , for instance: MySQL username and password.
Let’s install dotenv first:
1$ npm i dotenv
Then touch .env inside root and add the server port number into it:
1$ touch .env
1# .env
2SERVER_PORT=8080
In order to read the .env values, do this:
1// server.ts
2import dotEnv from "dotenv";
3dotEnv.config();
4
5console.log("Hello world with port: ", process.env.SERVER_PORT);

After all the installations are done, we can start configuring our server!
Setup Express server
Setup the server
Now let’s setup our server:
1// server.ts
2import express from "express";
3import dotEnv from "dotenv";
4dotEnv.config();
5
6const app = express();
7const port = process.env.SERVER_PORT || 8081;
8
9app.listen(port, () => {
10  console.log(`server is listening to port ${port}`);
11});
Then we add some middleware to parse our request data format:
1// server.ts
2// parse requests of content-type - application/json
3app.use(express.json());
4
5// parse requests of content-type - application/x-www-form-urlencoded
6app.use(
7  express.urlencoded({
8    extended: true,
9  })
10);
CORS (Cross-Origin Resource Sharing)
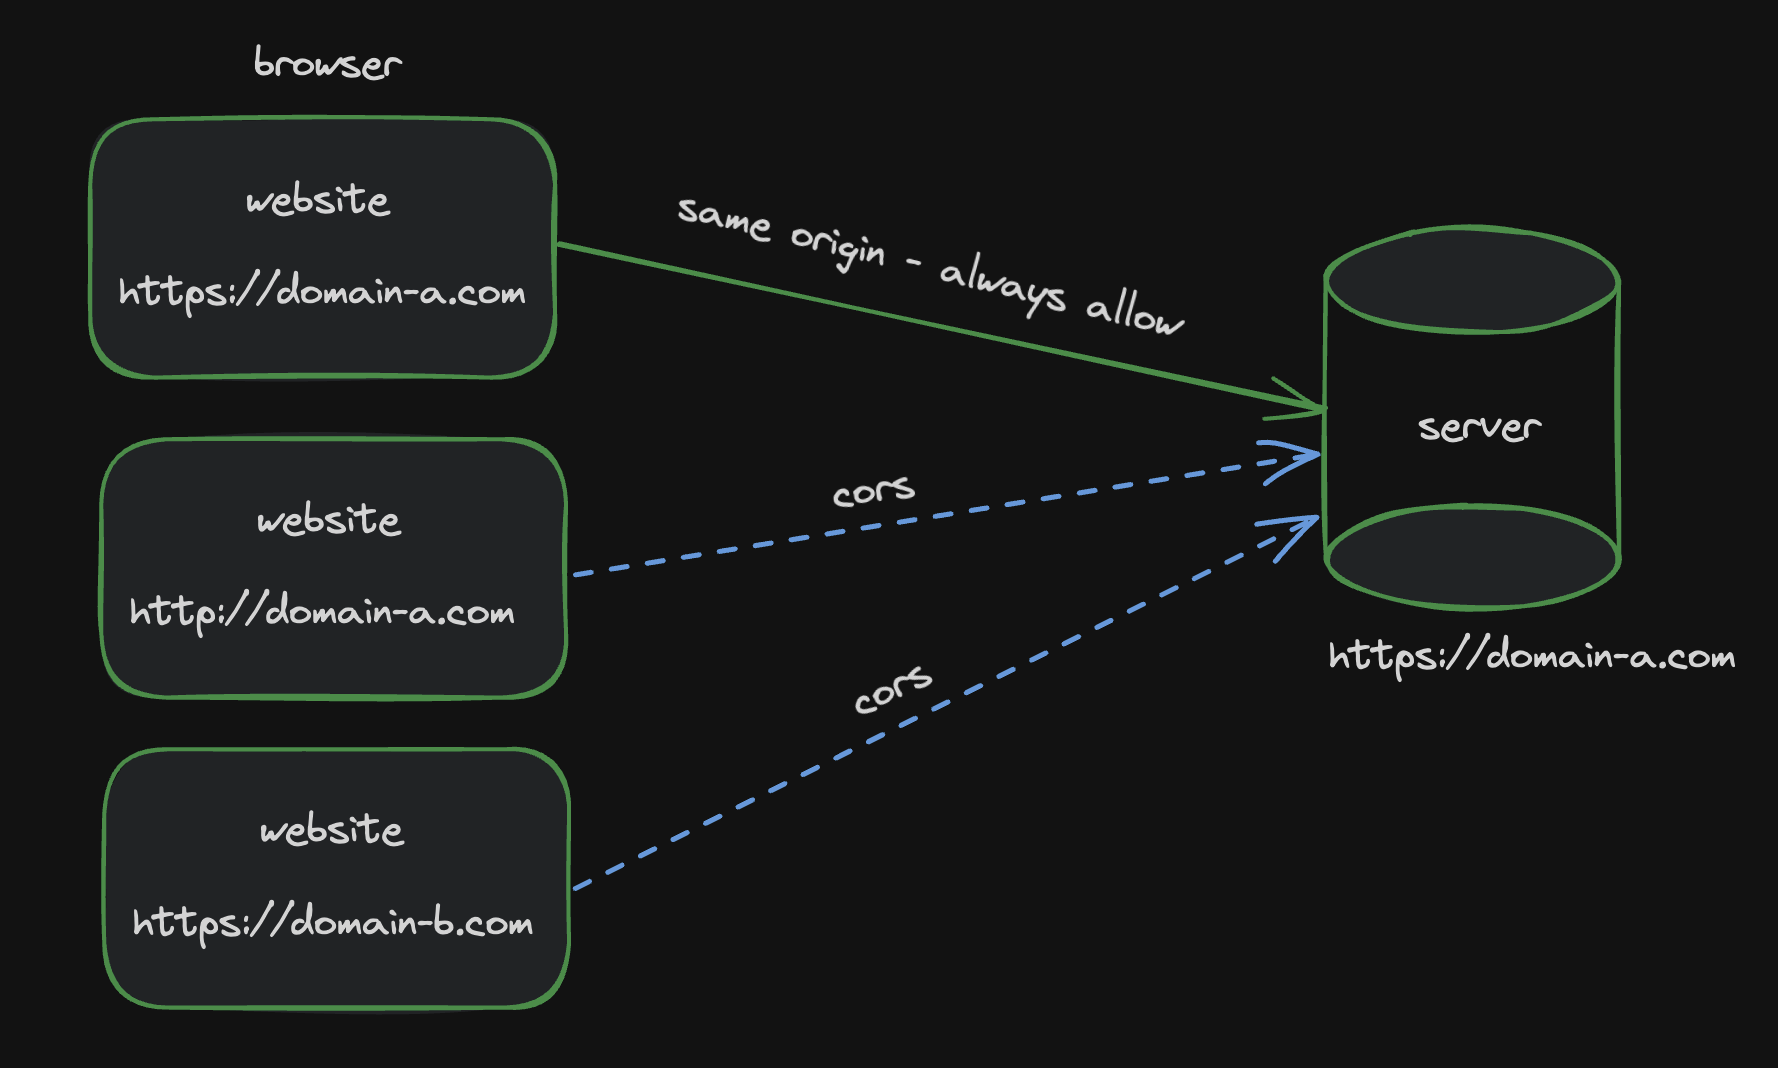
By default, inside the browser, only when the website has same origin as server does can it access the server’s resources. For example, if website domain-a.com request for resource from server domain-a.com , it will be a same-origin request, which is always allowed; on the other hand, if website domain-b.com request for resource from the same server, it will not be allowed since it is cross origin resource sharing (CORS).
To allow CORS, we will have to add this configure inside our server:
1# install cors first
2$ npm i cors
3$ npm i @types/cors --save-dev
1// server.ts
2import cors from "cors";
3
4const corsOptions = {
5  origin: "https://whatever_domain_you_want.com",
6};
7app.use(cors(corsOptions));
Now the request from this origin will be allowed.
If you would like to allow CORS to any origins, do this instead:
1app.use(cors());
We aren’t going to dive deep into what CORS is. For more detailed information, check here, here and here.
Our first router
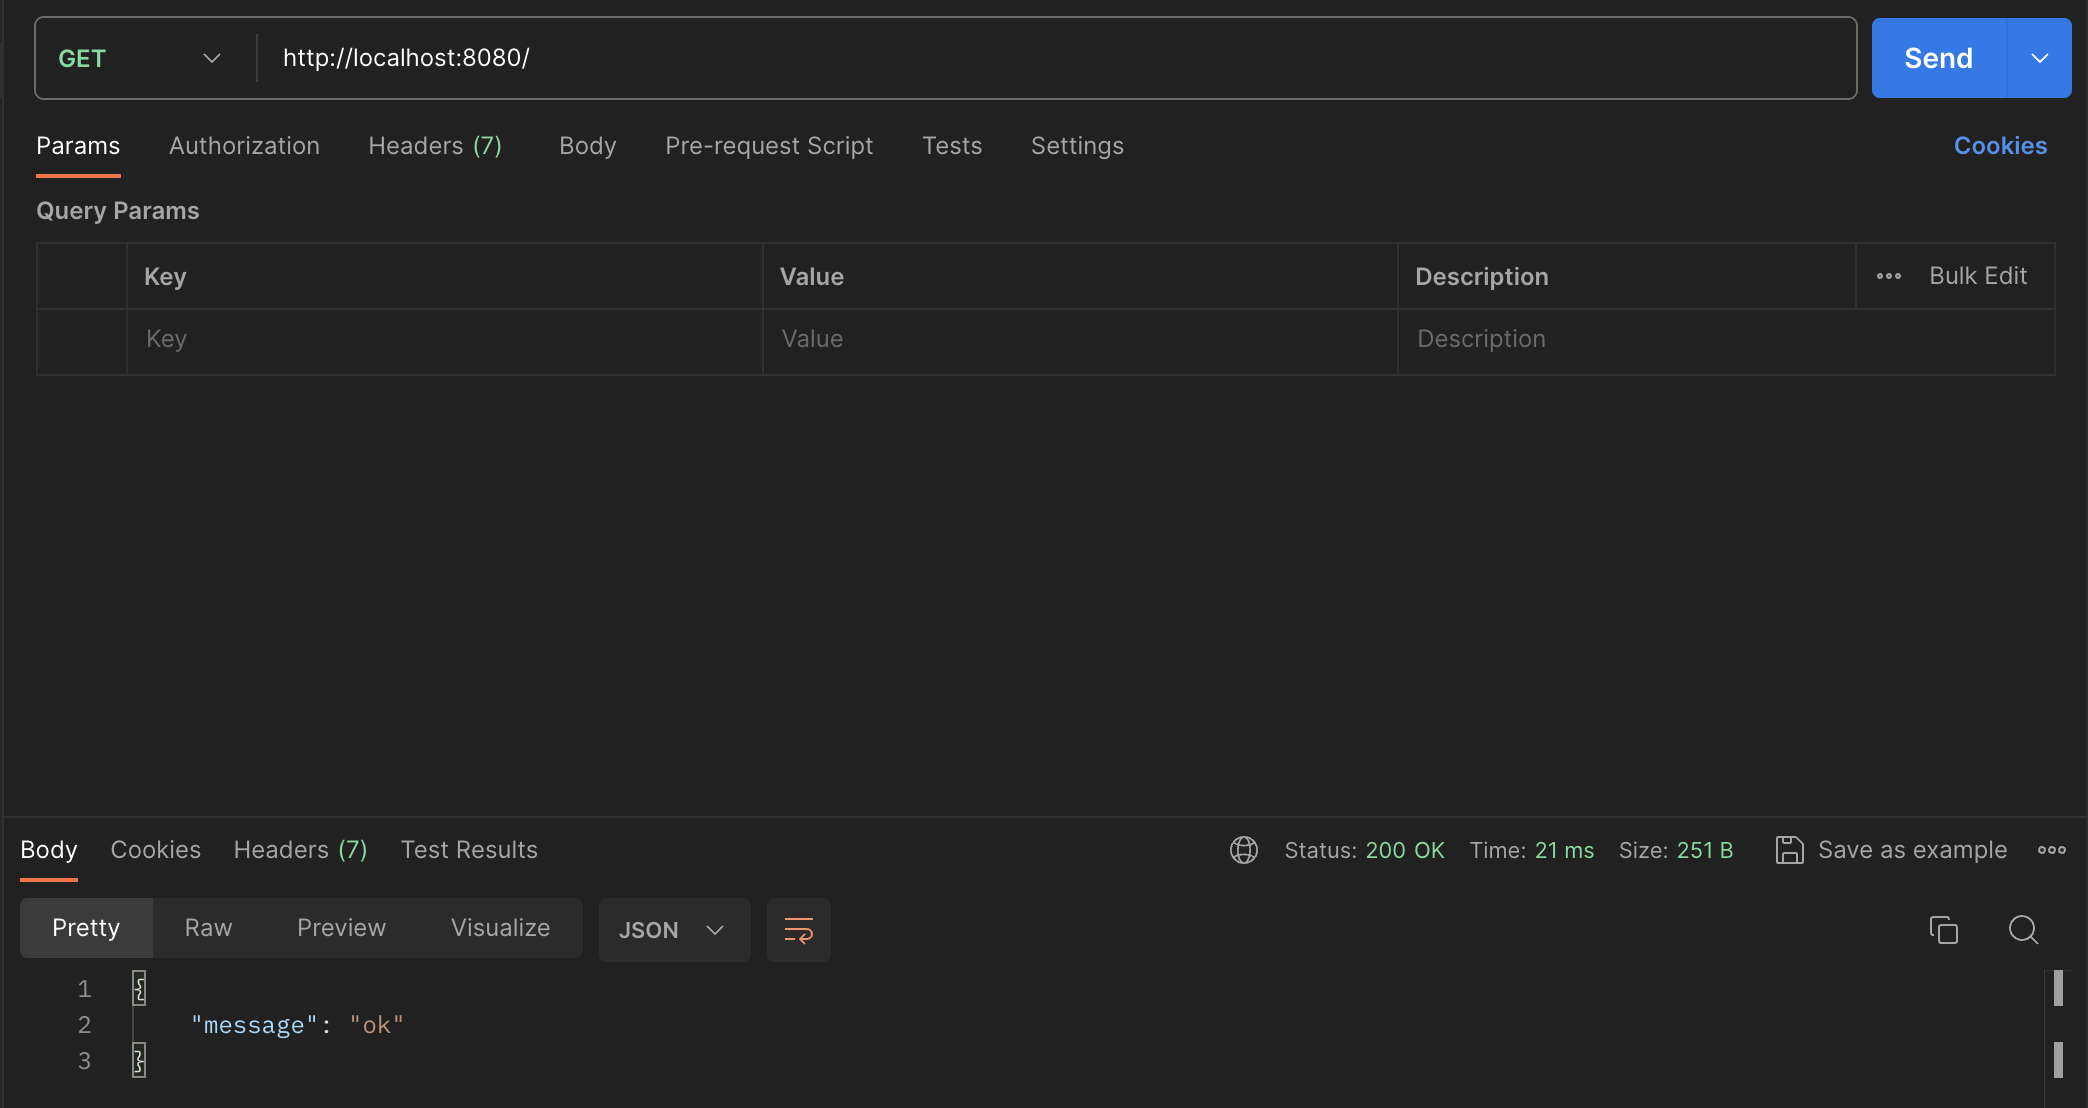
Now, we can add our first router and test with Postman to see if our server is working properly:
1// server.ts
2
3// first router
4app.get("/", (_, res) => {
5  res.json({
6    message: "ok",
7  });
8});
Project structure
We will split our server’s logic into three layers: router - controller - model.

When we hit an API route from client, we first execute the router layer, for example: a GET post route:
1// post.router.ts
2app.get('/post/', postController.get);
The router layer will then execute the corresponding controller, in this example, the postController.get callback:
1// post.controller.ts
2import { Request, Response } from "express";
3import { PostModel } from "../models/post.model";
4
5export const postController = {
6	getAll: async (req: Request, res: Response) => {
7		// ...
8	}
9}
Inside the controller, it will execute the corresponding model method, which will directly run the SQL command.
1// post.controller.ts
2import { Request, Response } from "express";
3import { PostModel } from "../models/post.model";
4
5export const postController = {
6	getAll: async (req: Request, res: Response) => {
7    // ...
8    const rst = await PostModel.getAllPosts();
9    // ...
10	}
11}
1// post.model.ts
2
3export const PostModel = {
4	getAllPosts: (): Promise<Post[]> => {
5    return new Promise((resolve, reject) => {
6      connection.query<Post[]>("SELECT * FROM post", (err, res) => {
7				if (err) reject(err);
8        else resolve(res);
9      });
10    });
11  }
12}
After model layer returns the query result to the controller, the controller processes the result and respond to the client.
1// post.controller.ts
2export const postController = {
3	get: async (req: Request, res: Response) => {
4		const rst = await PostModel.getAllPosts();
5		res.send(rst);
6	}
7}
With the router - controller - model structure, the server will be more maintainable and scalable.
To sum up, our project structure will look like this:
1.
2├── app
3│   ├── config
4│   │   └── db.config.ts // constant variables for database connection
5│   ├── controller
6│   │   └── post.controller.ts
7│   ├── model
8│   │   ├── db.ts // db connection
9│   │   └── post.model.ts
10│   └── router
11│       └── post.router.ts
12├── package-lock.json
13├── package.json
14├── server.ts
15└── tsconfig.json
Connect server to the database
After introducing the project structure, the last step of this section will be connecting server to MySQL database.
Inside .env , write down these constants:
1// .env
2DB_HOST=localhost
3DB_USER=root
4DB_PASSWORD=xxxx // your mysql root password
5DB_NAME=crud_express_mysql // the db name we use inside Setup MySQL section
Then we touch db.config.ts inside app/config/, and store connection-related constant variables inside mySQLConfig object:
1// db.config.ts
2export const mySQLConfig = {
3  HOST: process.env.DB_HOST,
4  USER: process.env.DB_USER,
5  PASSWORD: process.env.DB_PASSWORD,
6  DB: process.env.DB_NAME,
7};
Lastly, inside /app/model/db.ts , let’s connect our server to the database.
Install mysql2 library first, it allows us connect to MySQL database, and define SQL command inside the server:
1$ npm i mysql2
Then we can finish the connection process:
1// app/model/db.ts
2import mysql from "mysql2";
3import { mySQLConfig } from "../config/db.config";
4
5export const connection = mysql.createConnection({
6  host: mySQLConfig.HOST,
7  user: mySQLConfig.USER,
8  password: mySQLConfig.PASSWORD,
9  database: mySQLConfig.DB,
10});
11
12connection.connect((err) => {
13  if (err) {
14    throw err;
15  } else {
16    console.log("Successfully connected to mysql");
17  }
18});
To check if the connection works fine, import the connection in order to let the server runs the connection:
1// server.ts
2console.log(connection); // after testing, this log can be removed

Router
Inside post.router.ts, let’s initialize the router and define each post-related routes:
1import { Router } from "express";
2
3const router = Router();
4
5// define each routes, we will define controllers later
6router.get("/", (req, res) => {});
7router.get("/:postId", (req, res) => {});
8router.post("/", (req, res) => {});
9router.put("/:postId", (req, res) => {});
10router.delete("/:postId", (req, res) => {});
11
12export const postRouter = router; // rename
Then inside server.ts, activate postRouter by doing this:
1import { postRouter } from "./app/router/post.router";
2
3app.use("/post", postRouter);
Model
In order to let controller knows what to pass to the model and what it will get, we will have to define the model first.
Post type
Let’s define the post type first:
1// post.model.ts
2import { RowDataPacket } from "mysql2";
3
4// usually for data query from mysql,
5// we extend the row data type from RowDataPacket
6export interface Post extends RowDataPacket {
7  id: number;
8  title: string;
9  content: string;
10  createdAt: Date;
11  updatedAt: Date;
12}
Post model
Create a model object which wraps all the model methods inside:
1export const postModel = {
2  selectAllPosts: () => {},
3  selectPostById: () => {},
4  insertNewPost: () => {},
5  updatePostById: () => {},
6  deletePostById: () => {},
7};
Then we can start defining each methods.
Select all posts
1selectAllPosts: (): Promise<Post[]> => {
2  return new Promise((resolve, reject) => {
3    connection.query<Post[]>("SELECT * FROM post", (err, rst) => {
4      if (err) reject(err);
5      else resolve(rst);
6    });
7  });
8},
The method returns a promise Promise<Post[]> . Inside the method, we use connection to directly query from the database SELECT * FROM post , and return the query result.
Select post by id
1selectPostById: (postId: number): Promise<Post> => {
2	return new Promise((resolve, reject) => {
3		connection.query<Post[]>(
4			"SELECT * FROM post WHERE id = ?",
5			[postId],
6			(err, rst) => {
7				if (err) reject(err);
8        else resolve(rst?.[0]);
9			}
10		);
11	});
12},
One thing worth noted is that, inside the query command SELECT * FROM post WHERE id = ? , we are not writing the postId directly inside the query, instead, we put it in an array as a second param of connection.query , the reason why we do this is to prevent SQL injection.
SQL injection happens when the postId send from the client is something like '' OR 1 = 1;, in this case, the whole query will be like this:
1SELECT * FROM post WHERE id = '' OR 1 = 1;
The condition 1 = 1 will always be true, which in terms allowing the client to attack the database by retrieving, updating or even deleting on whatever data they want.
By using query placeholders (putting postId inside array as second params), we can escape the input passed to it before it is inserted into the query.
We are not going to deep dive into SQL injection, for more detailed reading, check here and here.
Insert new post
1insertNewPost: (title: string, content: string): Promise<Post> => {
2  return new Promise((resolve, reject) => {
3    connection.query<ResultSetHeader>(
4      "INSERT INTO post(title, content) VALUES(?, ?)",
5      [title, content],
6      async (err, rst) => {
7        if (err) reject(err);
8        else {
9          try {
10            const newPost = await postModel.selectPostById(rst.insertId);
11            resolve(newPost);
12          } catch (err) {
13            reject(err);
14          }
15        }
16      }
17    );
18  });
19},
We are querying the newPost by executing selectPostById with the new post id returned by the query again.
Noted that for insertion, update and deletion, the returned object type will be ResultSetHeader provided by mysql2.
Update post by id
1updatePostById: (
2  postId: number,
3  title: string,
4  content: string
5): Promise<Post> => {
6  return new Promise((resolve, reject) => {
7    connection.query<ResultSetHeader>(
8      "UPDATE post SET title = ?, content = ? WHERE id = ?",
9      [title, content, postId],
10      async (err, rst) => {
11        if (err) reject(err);
12        else {
13          try {
14            const newPost = await postModel.selectPostById(postId);
15            resolve(newPost);
16          } catch (err) {
17            reject(err);
18          }
19        }
20      }
21    );
22  });
23},
In this update query, we query the updated post again by using the postId passed in.
Delete post by id
1deletePostById: (postId: number): Promise<void> => {
2  return new Promise((resolve, reject) => {
3    connection.query<ResultSetHeader>(
4      "DELETE FROM post WHERE id = ?",
5      [postId],
6      (err, rst) => {
7        if (err) reject(err);
8        else {
9          resolve();
10        }
11      }
12    );
13  });
14},
Now that we finish coding the model layer, in the next section we will implement the controller layer, which will process the query result and respond to the client.
Controller
Post controller
Create a controller object which wraps all the controllers inside:
1// post.controller.ts
2export const postController = {
3	// ...
4};
Get all posts
getAllPosts controller will execute selectAllPosts , process the result and respond to client:
1import { Request, Response } from "express";
2import { postModel } from "../model/post.model";
3
4getAllPosts: async (req: Request, res: Response) => {
5  try {
6    const rst = await postModel.selectAllPosts();
7    res.send(rst);
8  } catch (err) {
9    res.status(500).send({
10      message: "Some error occurred while retrieving post list.",
11    });
12  }
13},
Get post by id
getPostById controller executes selectPostById , process the result and respond to client. Noted that we can extract the postId from the req.params.postId:
1getPostById: async (req: Request, res: Response) => {
2  const postId = Number(req.params.postId);
3  try {
4    const rst = await postModel.selectPostById(postId);
5		res.send(rst);
6  } catch (err) {
7    res.status(500).send({
8      message: `Some error occurred while retrieving post ${postId}`,
9    });
10  }
11},
Create new post
createNewPost controller executes insertNewPost , process the result and respond to client. We can extract title and content from req.body :
1createNewPost: async (req: Request, res: Response) => {
2  if (!req.body) {
3    res.status(400).send({
4      message: "Content can not be empty",
5    });
6  }
7
8  try {
9    const newPost = await postModel.insertNewPost(
10      req.body.title,
11      req.body.content
12    );
13    res.send(newPost);
14  } catch (err) {
15    res.status(500).send({
16      message: `Some error occurred while creating new post`,
17    });
18  }
19},
Update post by id
upatePostById controller executes postModel.updatePostById , process the result and respond to client. We can extract postId, title and content from req.body :
1import { Post } from "../model/post.model";
2
3updatePostById: async (req: Request, res: Response) => {
4  const postId = Number(req.params.postId);
5  if (!req.body) {
6    res.status(400).send({
7      message: "Content can not be empty",
8    });
9  }
10
11  try {
12    const { title, content }: Pick<Post, "title" | "content"> = req.body;
13    const updatedPost = await postModel.updatePostById(
14      postId,
15      title,
16      content
17    );
18    res.send(updatedPost);
19  } catch (err) {
20    res.status(500).send({
21      message: `Some error occurred while updating post ${postId}`,
22    });
23  }
24},
Delete post by id
deletePostById controller executes postModel.deletePostById , process the result and respond to client. We can extract postId from req.body :
1deletePostById: async (req: Request, res: Response) => {
2  const postId = Number(req.params.postId);
3  try {
4    const rst = postModel.deletePostById(postId);
5    res.send(rst);
6  } catch (err) {
7    res.status(500).send({
8      message: `Some error occurred while deleting post ${postId}`,
9    });
10  }
11},
Update controllers inside post.router.ts
1// post.router.ts
2router.get("/", postController.getAllPosts);
3router.get("/:postId", postController.getPostById);
4router.post("/", postController.createNewPost);
5router.put("/:postId", postController.updatePostById);
6router.delete("/:postId", postController.deletePostById);
1// server.ts
2import { postRouter } from "./app/router/post.router";
3app.use("/post", postRouter);
Test the APIs
We will use Postman to test our APIs.
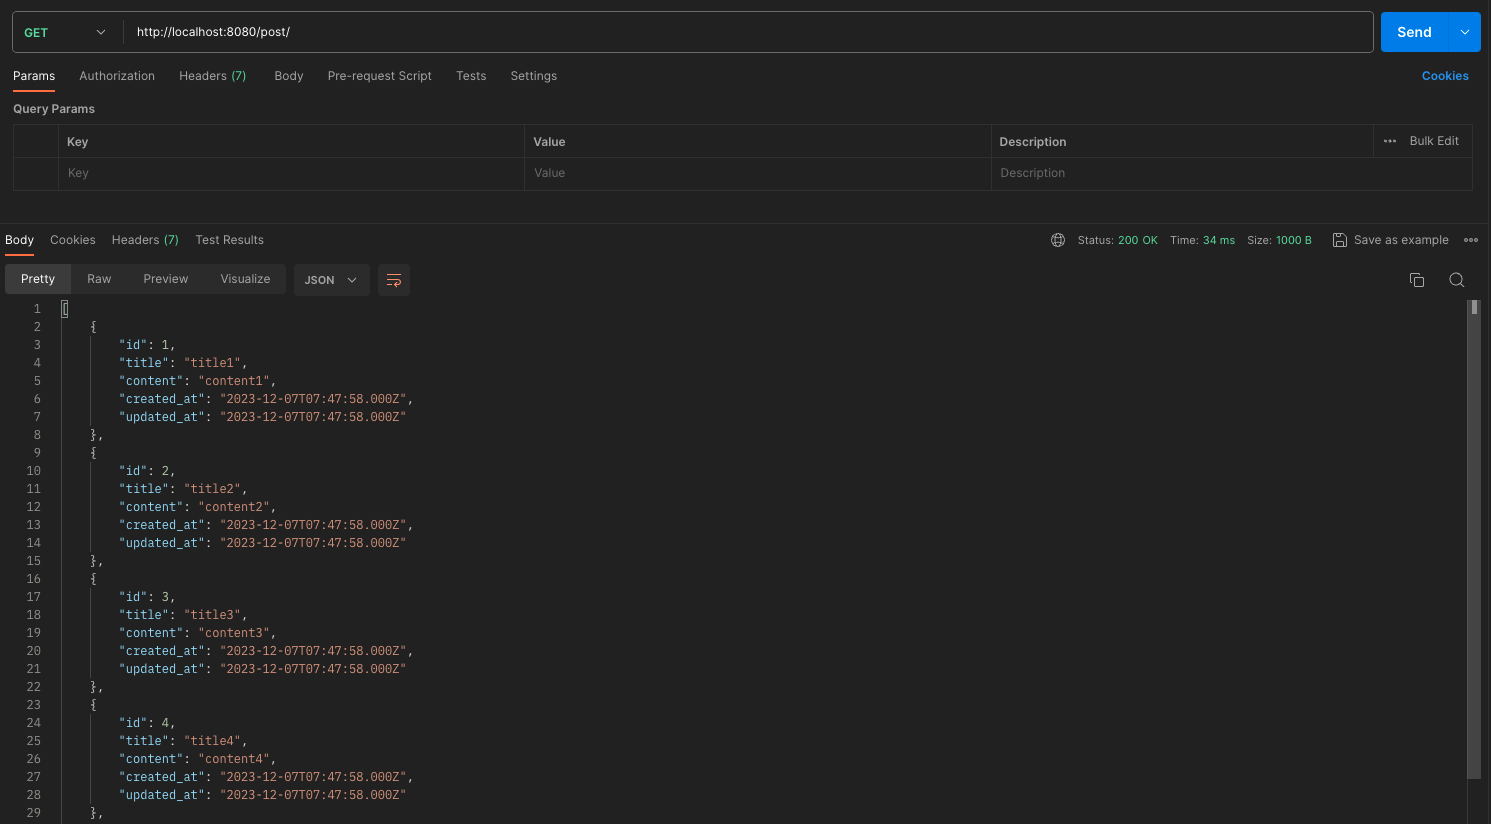
Test on GET /post/
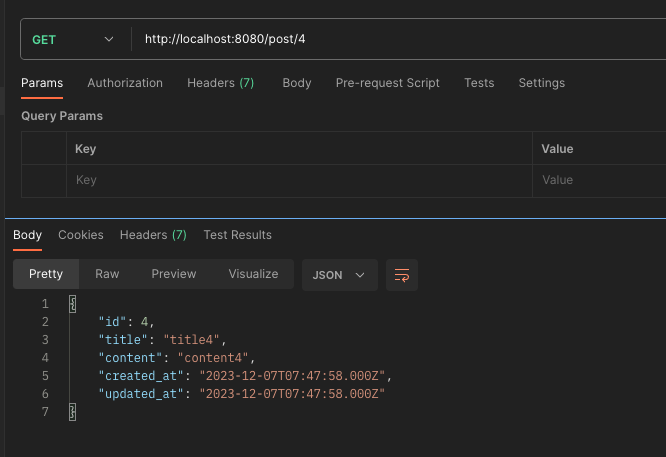
Test on GET /post/postId
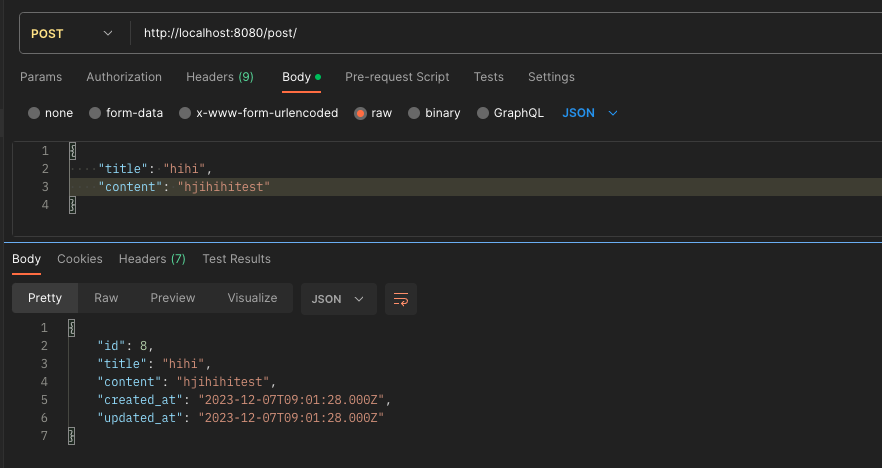
Test on POST /post/
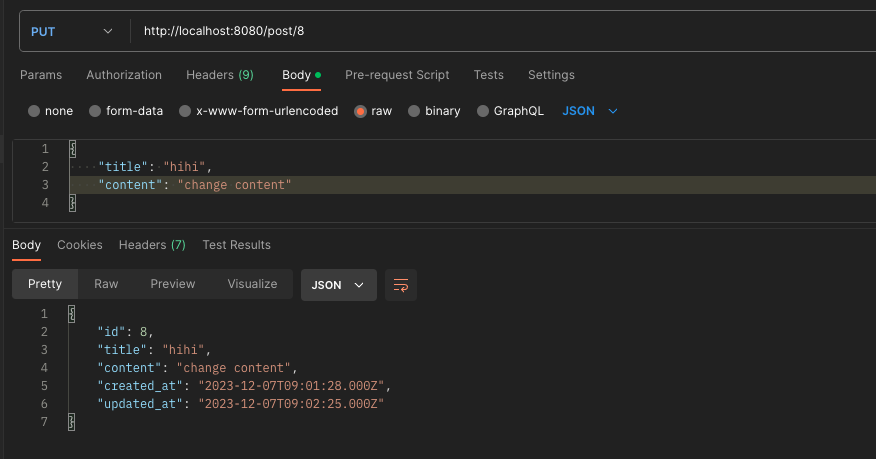
Test on PUT /post/postId
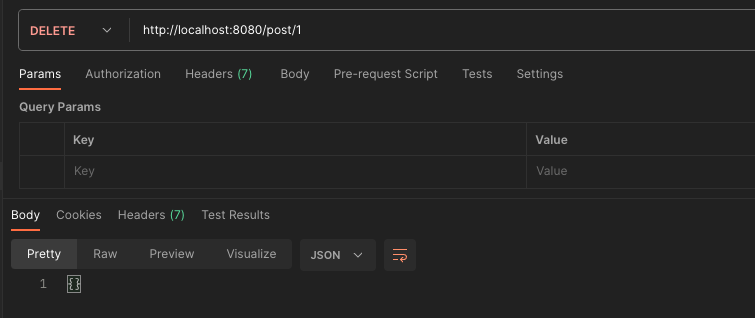
Test on DELETE /post/postId
Delete post with id 1:
And check with GET /post/ :

Deploy our server and host the database
Host the database
Before deploy the server, we have to host the database on the Clever Cloud platform, and create the another database and table on the machine which hosted our database.
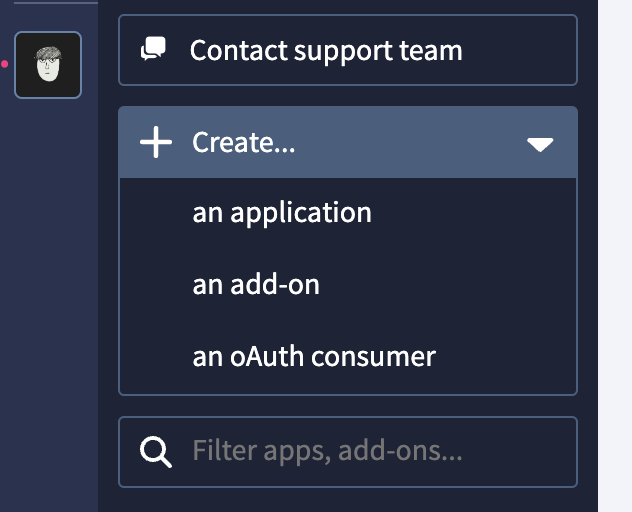
Login to the Clever Cloud dashboard, click “an add-on”:
Select “MySQL”, choose the “DEV” plan and click next, then you will be navigate to the DB config page. Inside the page, it will show you these information:
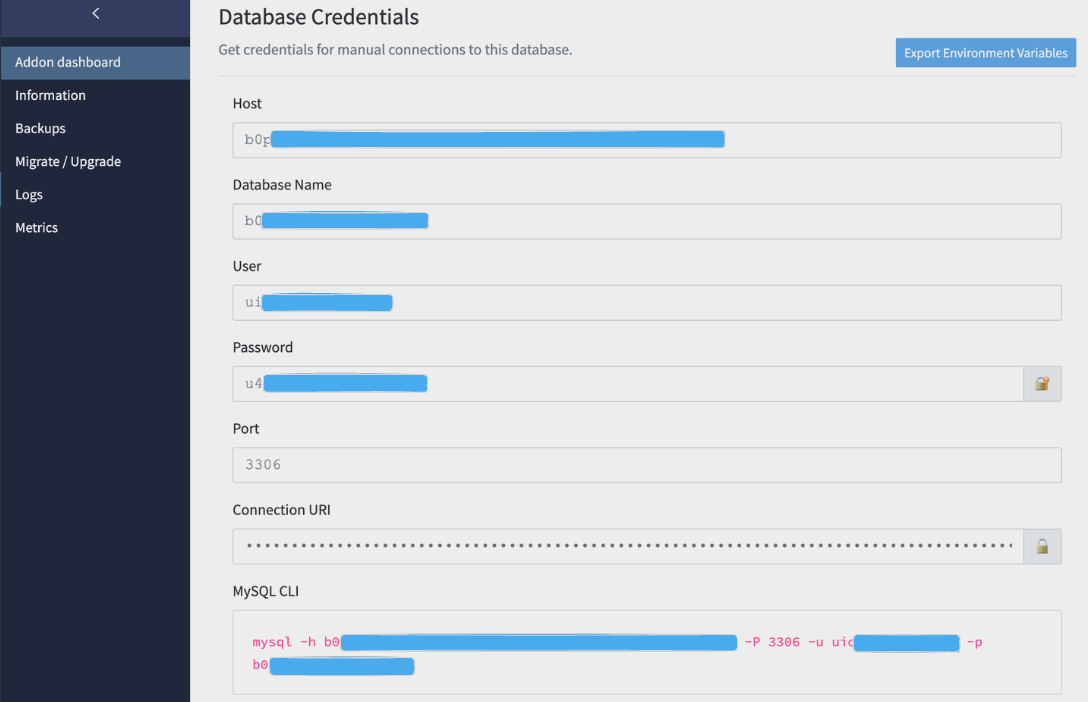
We will login to the machine by copying the CLI it provides us:
1$ mysql -h b0pxxxxxxxxxxxxx-mysql.services.clever-cloud.com -P 3306 -u uioxxxxxxxxxx -p
2> # enter the password here
Then you will be logged into mysql on the machine. Then you can switch to the database it provides us:
1mysql> use b0ppnyxxxxxxxxx # the Database Name it provides us
Now, create the table just like what we’ve done in Setup MySQL section:
1CREATE TABLE post (
2	id INT AUTO_INCREMENT PRIMARY KEY,
3	title VARCHAR(255) NOT NULL,
4	content VARCHAR(1000) NOT NULL,
5	created_at DATETIME NOT NULL DEFAULT CURRENT_TIMESTAMP,
6	updated_at DATETIME NOT NULL DEFAULT CURRENT_TIMESTAMP ON UPDATE CURRENT_TIMESTAMP
7)
8ENGINE=innodb CHARSET=utf8mb4 COLLATE utf8mb4_general_ci;
You can also insert some initial data for later API testing:
1INSERT INTO post(title, content) VALUES
2('title1', 'content1'),
3('title2', 'content2'),
4('title3', 'content3'),
5('title4', 'content4'),
6('title5', 'content5'),
7('title6', 'content6');
Deploy the server
After hosting the database and re-created the post table, we can now deploy our server onto Render.
Login to the dashboard, create new Web Service:
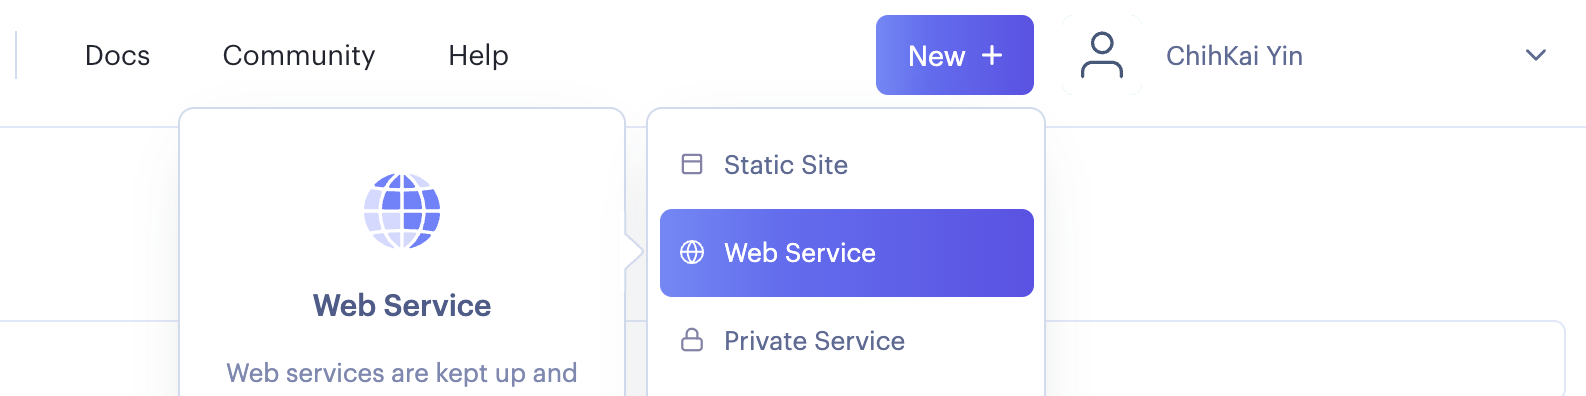
Connect to the Github repo. Then we can start filling out the deploy config:
| Name | crud-express-mysql-demo |
|---|---|
| Region | Singapore |
| Branch | main |
| Runtime | Node |
| Build Command | npm run build |
| Start Command | npm run start |
| Instance Type | Free |
For Build Command and Start Command, we will have to add them into the script inside package.json :
1{
2	"build": "npm install && tsc",
3  "start": "node ./server.js",
4}
Now, when running build command, it will first install all NPM packages, then run tsc to compile all TypeScript code into JavaScript. Then by running start command, we can use Node to run the compiled server.js.
The last step will be filling the environment variables:
| Key | Value |
|---|---|
| SERVER_PORT | 8080 |
| DB_HOST | b0pxxxxxxxxxxxxx-mysql.services.clever-cloud.com |
| DB_USER | uioxxxxxxxxxx |
| DB_PASSWORD | u4xxxxxxxxxxx |
| DB_NAME | b0ppnyxxxxxxxxx |
Noted to use the config the Clever Cloud provides us.
Now click create service, it will start the build and start process. If they all succeeded, you will see these in the log:

You can check if the APIs are working well by using the url Render provide you.
Voilà! Our server is now on production. Hope you enjoy and learn something from this article.
References
- 创建表时附带的ENGINE=InnoDB DEFAULT CHARSET=utf8 COLLATE = utf8_general_ci ROW_FORMAT = Dynamic 的解释
- What does character set and collation mean exactly?
- Build Node.js Rest APIs with Express & MySQL
- Cross-Origin Resource Sharing (CORS)
- What does the function call app.use(cors()) do?
- Same-origin policy
- How to Create MySQL Connection with Node JS using Sequelize and Express
- Using MySQL in Node.js with TypeScript
- How do I express a date type in TypeScript?
- TypeScript type annotation for res.body
- Deploy Node ExpressJS MySQL to Render